microservices-demo
A very simple Go-Redis app to demo discovery of multiple services behind a haproxy load balanced (using the interlock plugin system).
This demo uses Docker Swarm, docker-compose and HA Proxy as the load balancer service through the interlock plugin system. If you need a simpler demo that does not use docker-compose, try the interlock-demo.
Pre-requisites
- Ensure Docker Swarm is working. An effective demo would require at least 3 active nodes in the swarm.
- Docker version > 1.8, docker-compose version > 1.3.1, and Swarm version > 0.4
- Set the
DOCKER_HOSTenvironment variable to the Docker Swarm's tcp endpoint. Do not use localhost, even if you are on the Docker Swarm manager / master. Example:export DOCKER_HOST=tcp://10.0.0.6:9999. -
docker infoshould show the nodes added to the cluster.
Steps
- Clone this repo to a local folder.
git clone https://github.com/anokun7/microservices-demo.git cd microservices-demo-
Use docker-compose to build and run the web app containers.
docker-compose up -dvagrant@ubuntu5:~/microservices-demo$ docker-compose stop ; docker-compose rm -f ; docker-compose up -d Stopping microservicesdemo_db_1... done Stopping microservicesdemo_lb_1... done Stopping microservicesdemo_dbdata_1... done Going to remove microservicesdemo_db_1, microservicesdemo_lb_1, microservicesdemo_dbdata_1 Removing microservicesdemo_db_1... done Removing microservicesdemo_lb_1... done Removing microservicesdemo_dbdata_1... done Creating microservicesdemo_dbdata_1... Creating microservicesdemo_lb_1... Creating microservicesdemo_db_1... Creating microservicesdemo_web_1... - Every container started in a swarm cluster gets registered to the ha-proxy as a backend as long as the container has an exposed port and a hostname.
- The hostname for the
webcontainer is configured in thedocker-compose.ymlusing theINTERLOCK_DATAenvironment variable.
- The hostname for the
-
Let's again use docker-compose to scale up the number of web containers to 10. Each of these 10 web containers will also get registered to the same backend in the HA Proxy config.
vagrant@ubuntu5:~/microservices-demo$ docker-compose scale web=10 Creating and starting 2... done Creating and starting 3... done Creating and starting 4... done Creating and starting 5... done Creating and starting 6... done Creating and starting 7... done Creating and starting 8... done Creating and starting 9... done Creating and starting 10... done - Tha HA Proxy stats page should (auto) refresh to show the newly registered backends, like below:
- It may be necessary to restart the lb (load balancer) container running HA Proxy. Do this if you do not see any backends registering after the scale up action.
vagrant@ubuntu5:~/microservices-demo$ docker-compose restart lb
Restarting microservicesdemo_lb_1...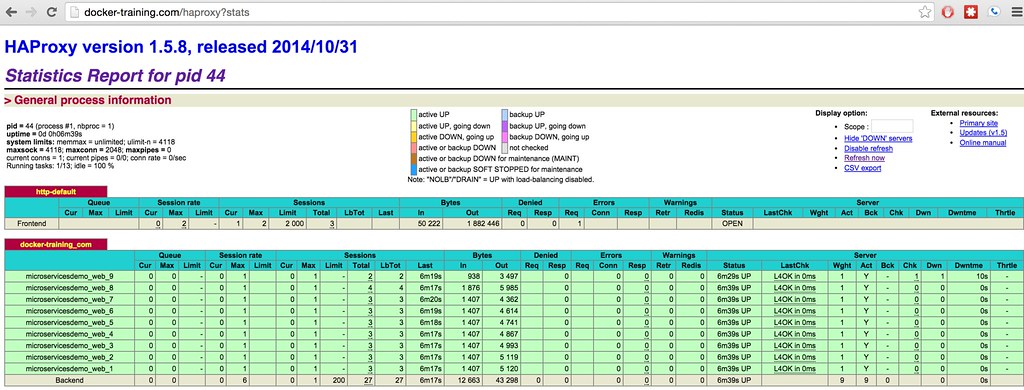
- Ensure DNS is setup (or add entries to
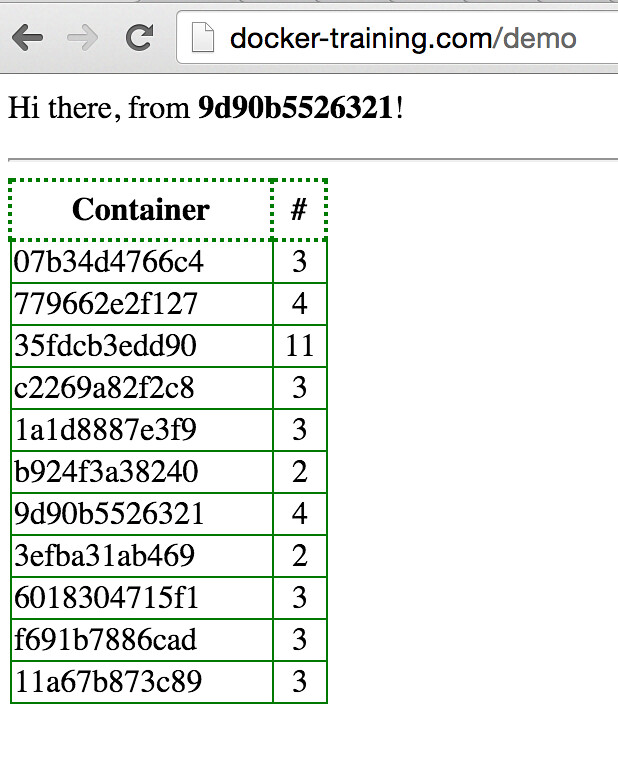
/etc/hostsfile) to resolve the host where thelb0container is running. - Browse to the URL:
http://[host-ip-running-lb0]/demo - Every time a container responds to the HTTP request, it will get its counter incremented (on a browser refresh). The counter is being stored (and retrieved) from a REDIS backend database.
- Using docker-compose, you can scale up or down the web containers as you wish based on the needs and traffic to your application.